
by Koala
[Part 2 of 3]
|
|
Contrary to what you might think, I do not use "Photoshop." Quite frankly, I don't know how! To make my manips, I used an old version of the first program I ever bought to do this called "Picture It" by Microsoft. When I first bought this app in 1998, it was version 1.0. I bought it again in 2000 for some useful and updated features (version 4.0). It's the 2000 version that I still use today. Incidentally, I have demoed other versions of "Picture It" since then, but they made a radical change to the program in the 2001 version onward that I never really liked, which is why I never upgraded. One day, I'm going to learn how to use "Photoshop!" Really, I am!
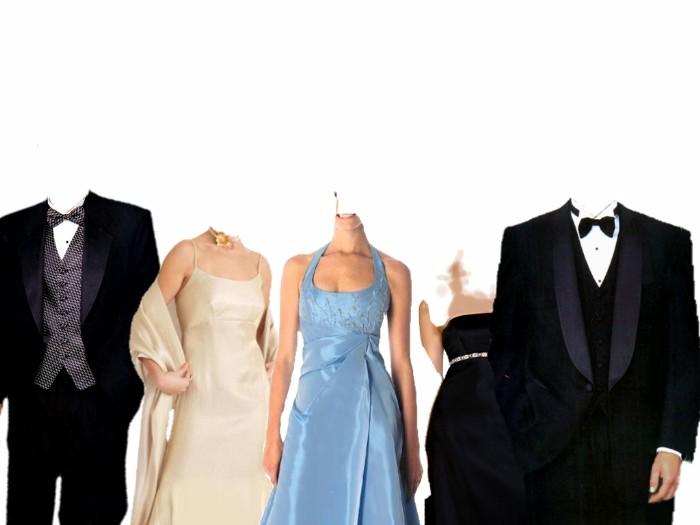
Back to my featurette. Now that I had all the assembled parts I needed, I now just needed to put them all together. First stage of this was creating a blank canvas to work with. Mine was 1024x768, because I was told to make this "wallpaper" size. I cutout the bodies and pasted them on my canvas, deciding on position and placement for the characters as shown below.
|
|
|
Next I made my head cutouts (see below), deciding on how much of the original I needed to use (re: Willow and Buffy) and which ones needed to be flipped. At this point, I did my preliminary match of all the facial and body skin tones using brightness, contrast, and tint controls. You'll note that Giles' head, in this first draft, is different to what was used in the final photo. This Giles shot was what I start with. More on the change later.
|
|
|
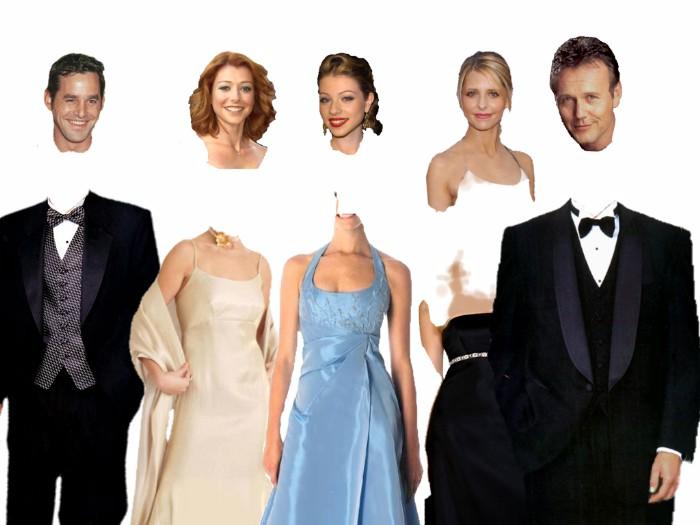
Then, as you can see in the pic below, I grafted the heads onto to the bodies...which on any other website would probably read as a totally weird sentence! Note that you can still see the joins.
|
|
|
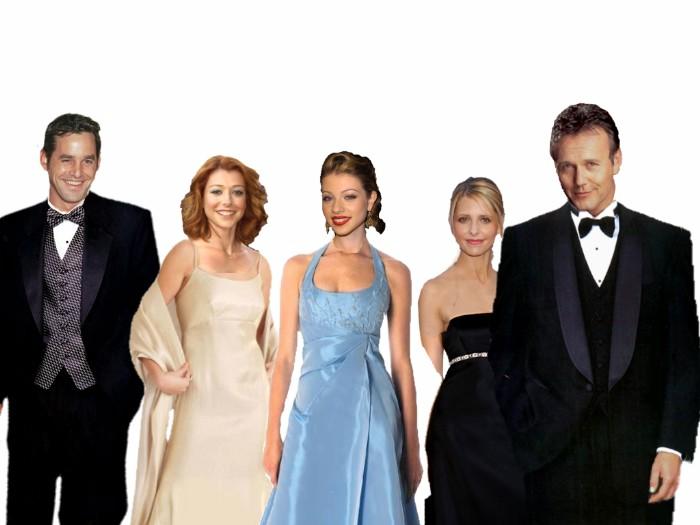
Time to add the extras. In the pic below, 'Buffy's arm' cutout and the 'hands on arm' cutout were added into this mix. But you can still see all the seams left from the grafting, so next I turned to my paintbrush and began freehand painting. I do this with my mouse, although I have recently invested in a WACOM tablet. I've yet to master that, but when I do I think it will be a lot easier than using a mouse.
|
|
|
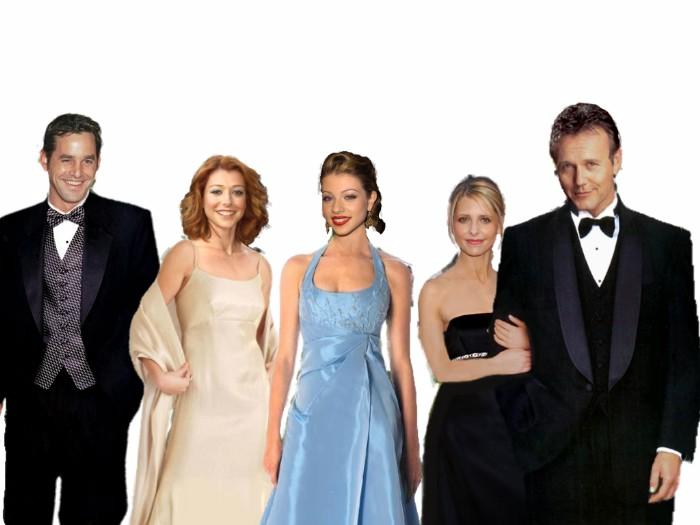
In the above pic, you'll notice the 'fuzz' I painted in around the characters. This is because when the background was added (below), more touching up was needed to blend the characters into the shot. Lastly, Buffy's locket was added, and version 1.0 of the prom photo can be seen below.
|
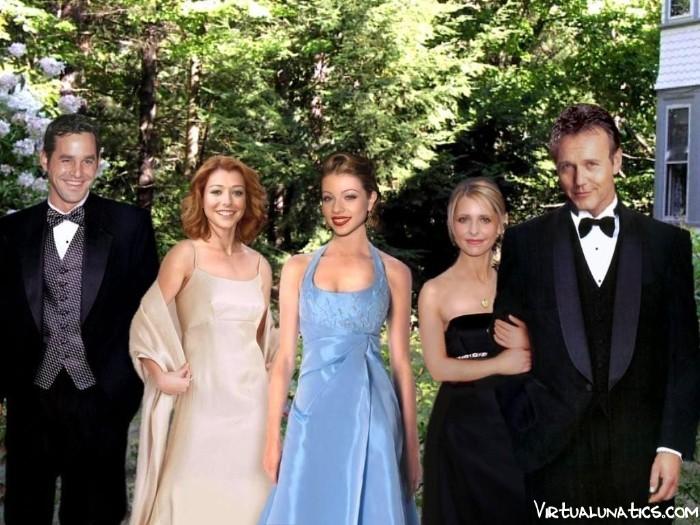
|
|
At this point, I thought I was done. I was wrong.
|
|
